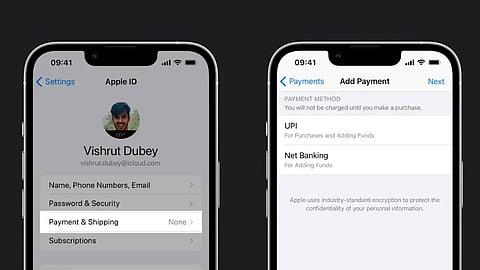
Apple Inc has now added United Payments Interface (UPI) and Netbanking as a payment option for Indian users on its App Store. This comes weeks after the US tech company stopped accepting Indian debit and credit cards for payments for subscriptions and app purchases on its App store.
Apple Adds UPI And Netbanking As Payment Option For Indian Users On App Store
A few weeks back, Apple had removed Indian debit and credit card payments as it could not comply with an RBI directive. Now Apple has added UPI and Netbanking as alternative payment options for Indian users.
Apple had faced difficulty complying with a Reserve Bank of India (RBI) directive, and hence had to stop this payment mechanism. But due to the removal of this facility on Apple’s App Store, Indian users were facing great difficulties.
Now, Apple has sent an email to its users which lists an alternative UPI and Netbanking payment mechanism to allow them to continue paying for their subscriptions and app purchases on the App Store.
“In light of upcoming Reserve Bank of India regulations, starting June 1, credit and debit cards can no longer be used for purchases or subscriptions on the App Store or other Apple services. Apple will no longer store card information on file, since protecting your payment method is our top priority,” read an email from Apple.
How Will It Work?
Apple mentioned in the said email that users would be able to pay for subscriptions and other services using the Apple ID credit system. The Apple ID credit system supports Netbanking, UPI and Apple ID store codes.

Here is how to do that on iPhone or iPad:
Step1: Go to the App Store.
Step2: Click on your profile icon on the top right corner.
Step3: Navigate below to find “Add funds to your Apple ID tab”.
Step4: Select the amount.
Step5: Pay for it using Netbanking, UPI, Apple ID code, and others.
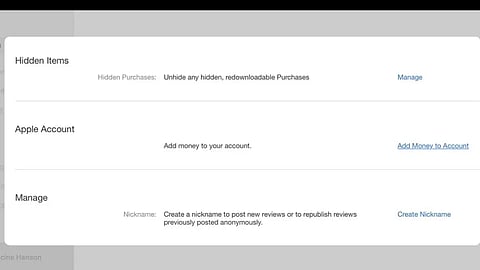
Here is how to do it on Mac:
Step1: Open the App Store and sign in with your Apple ID.
Step2: Open your account information page by navigating to your name icon or the account button in the sidebar.
Step3: Find a column which says ‘view information’, then click on it.
Step4: After clicking it, you will see an ‘add money to account’ option with blue hyperlink. Now proceed to add your desired amount of money.

Also, do note that you will have to mandatorily add balance in your Apple ID well before the subscription renewal date. That’s because on the date of subscription, if there is no balance, then it will not auto-renew, and you will lose access to your subscribed service.